

Quick Answer
To jump start a car battery, turn off both vehicles. Connect the red clamp to the dead battery’s positive (+) terminal, then the other red clamp to the donor battery’s positive terminal. Attach the black clamp to the donor battery’s negative (-) terminal, and ground the final black clamp to unpainted metal on the dead car. Start the donor car, wait two minutes, then start the dead car.
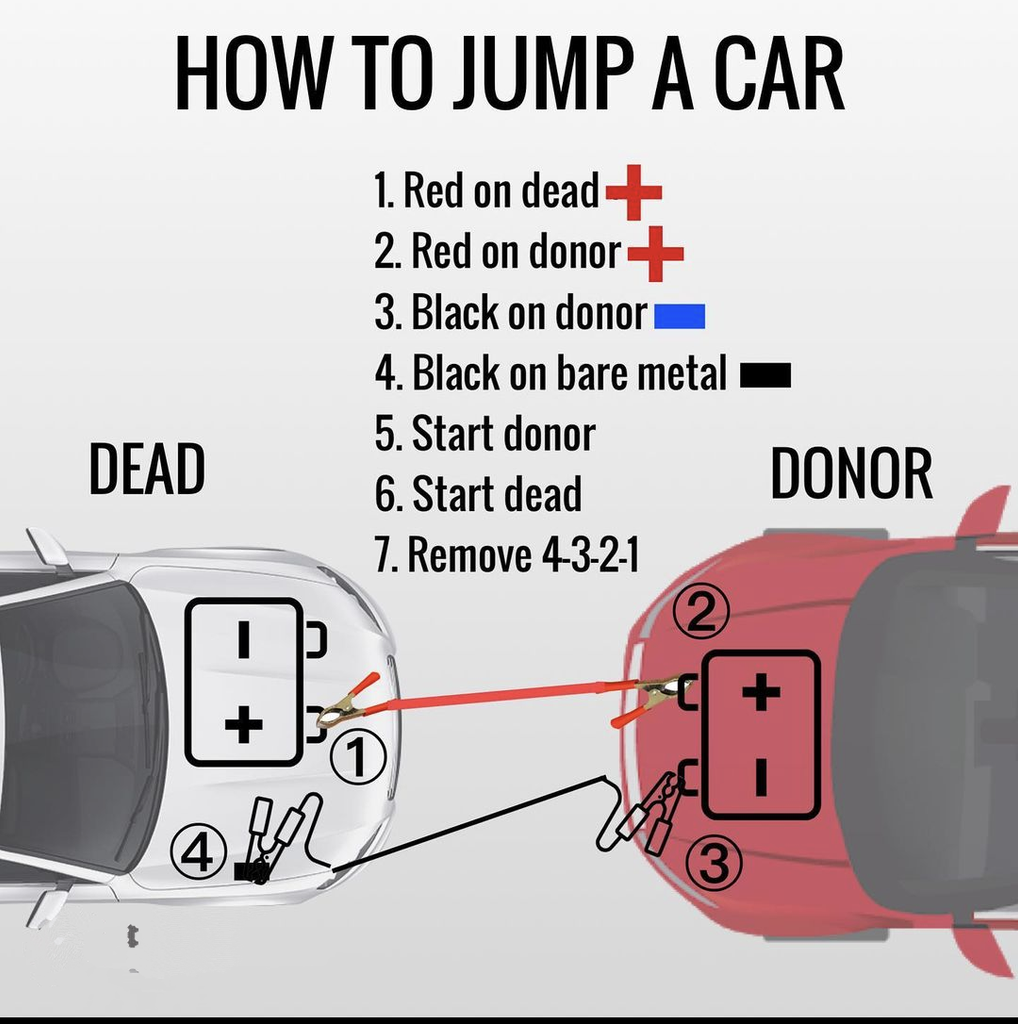
A flat 12-volt battery is one of the most common reasons an engine refuses to turn over. Whether your lights stayed on overnight or cold weather drained the remaining charge, knowing how to jump start a car with cables lets you get moving without waiting hours for roadside recovery.
Jump-starting delivers an external surge of direct current from a healthy donor vehicle to crank your starter motor. However, modern cars carry sensitive Engine Control Units (ECUs) and sensors. Connecting jumper leads incorrectly can blow fuses or cause electrical arcing. Follow this guide to jump start your car battery quickly and safely.
What You’ll Need
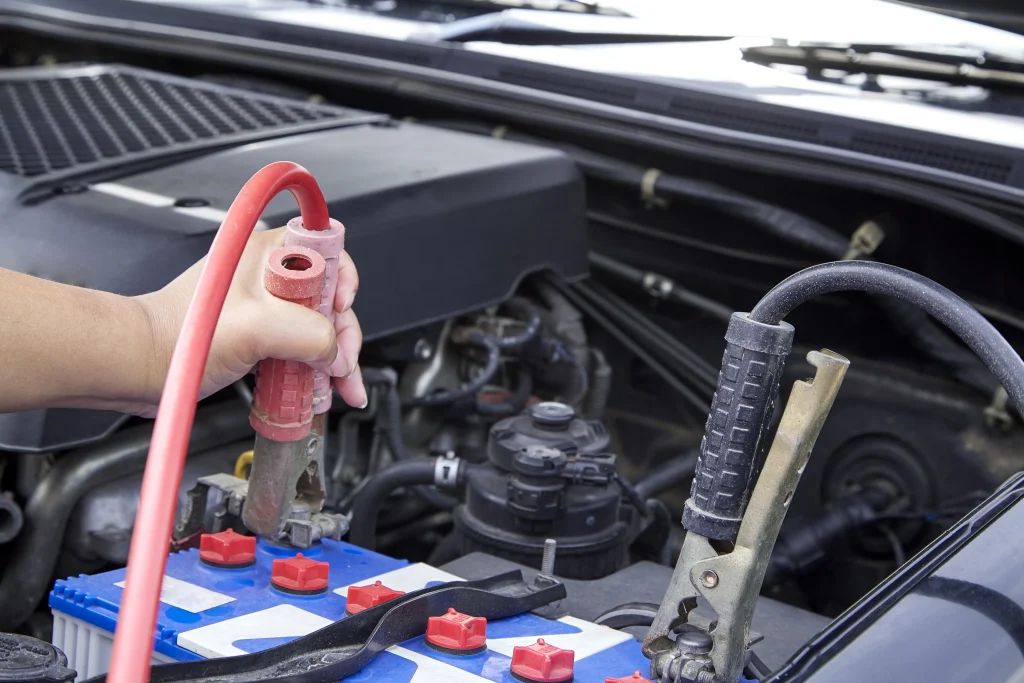
Gather these essential tools before popping the hoods:
- Jumper Cables (Booster Leads): Use heavy-duty, insulated copper cables (ideally 4-gauge to 6-gauge) that are at least 10 to 12 feet long. Thinner 10-gauge leads struggle to carry enough cranking amps for larger engines or SUVs.
- A Functional Donor Vehicle: A car with an operational 12V battery matching the voltage of the dead car. (Never use a 24V commercial truck to jump a standard 12V passenger vehicle).
- Protective Gear: Work gloves and safety glasses to shield against potential sparks or battery acid residue.
- Wire Brush or Rag: Useful for clearing corrosion or white lead sulfate powder off the terminals before clamping.
Step-by-Step Instructions
Follow this strict sequence to protect both vehicles’ electrical systems.
1.Park and Prep Both Vehicles:
Ensure the cars do not touch physically.
Park the donor vehicle facing the disabled car with enough space for cables to hang slack. Put both cars in Park (or Neutral for manual transmissions) and firmly engage both emergency handbrakes. Switch off both engines. Turn off all electronics, including headlights, air conditioning, infotainment screens, and cabin lights.
2.Locate Terminals and Clean Corrosion:
Pop both hoods and locate the 12V battery terminals. The positive terminal is usually marked with POS, a plus sign (+), or a red plastic cover. The negative terminal is marked with NEG, a minus sign (–), or a black cover. If terminals are coated in white or blue powdery residue, wipe them clean with a cloth or brush to ensure strong electrical contact.
3.Connect Red Lead to Dead Battery Positive (+):
Take the first red clamp and attach it firmly to the positive terminal of the dead vehicle’s battery. Ensure the metal teeth bite through any surface grime into clean metal.

4.Connect Red Lead to Donor Battery Positive (+):
Take the opposite red clamp and fasten it securely to the positive terminal of the running donor car’s battery. Keep the dangling black clamps separated so they do not touch each other or any metal bodywork.
5.Connect Black Lead to Donor Battery Negative (-):
Attach the first black clamp to the negative terminal of the donor car’s battery.
6.Ground the Final Black Lead on Dead Car:Never connect this clamp to the dead battery terminal.
Attach the remaining black clamp to an unpainted, solid metal part of the disabled car’s engine block, frame bolt, or designated chassis ground. Keep this point well away from the dead battery, fuel injection lines, and moving belts.
7.Start Donor Engine and Idle:
Turn on the donor car’s engine. Let it idle smoothly for 3 to 5 minutes. If the dead battery was deeply discharged, gently rev the donor engine to 1,500–2,000 RPM to boost alternator output and send initial surface charge into the dead battery.
8.Start Disabled Vehicle and Disconnect Leads:Disconnect in exact reverse order.
Turn the key or push the start button on the disabled car. It should crank and fire up. If it does not start immediately, wait 3 minutes and try again.
Once the engine is running, do not turn it off. Carefully remove the cables in reverse order:
- Unclamp the grounded black clamp from the revived car.
- Unclamp the black clamp from the donor car’s negative terminal.
- Unclamp the red clamp from the donor car’s positive terminal.
- Unclamp the red clamp from the revived car’s positive terminal.
Common Mistakes to Avoid
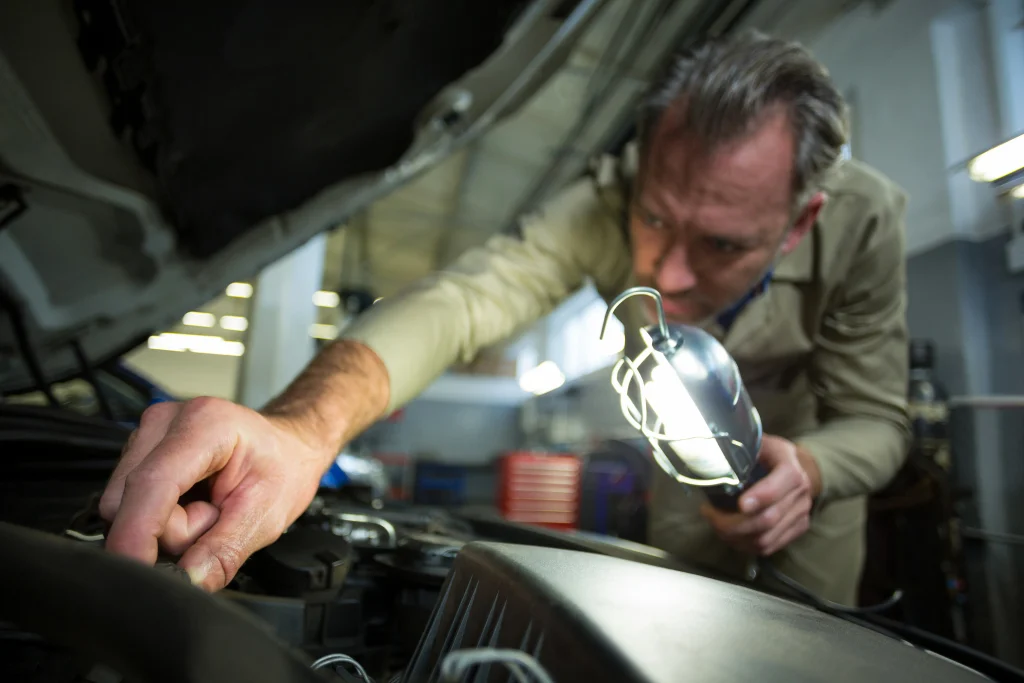
- Connecting Clamps in Reverse Polarity: Putting red to negative and black to positive will instantly blow the main alternator fuse, melt wire shielding, and potentially destroy the vehicle’s electronic control unit.
- Letting Free Clamp Ends Touch: While one end is clamped to a live battery, allowing the opposite red and black clamps to touch will produce intense sparks, short-circuiting the battery.
- Grounding directly on the Dead Negative Post: Lead-acid batteries produce flammable hydrogen gas during heavy discharge. Clamping to the negative post creates an initial spark directly above the vent caps, creating an explosion risk. Always clamp to the unpainted frame or engine metal.
- Shutting the Revived Car Off Immediately: A car’s alternator requires time to recharge a flat battery. Turning the engine off immediately after removing the jumper leads will strand you again.
- Using Tapered or Broken Jumper Leads: Frayed insulation or loose jaw springs create high electrical resistance, generating heat instead of transferring starting current.
Safety Notes / When to Call a Professional
Before attempting to jump start car battery systems, inspect the physical battery casing:
- Swollen or Cracked Casing: If the battery case looks bloated, bowed outward, or cracked, chemical pressure has built up internally. Do not jump start it. It can rupture or leak sulfuric acid. Call roadside assistance for a replacement.
- Frozen Battery: In sub-zero winter temperatures, a discharged battery’s electrolyte fluid turns to ice. Attempting to jump a frozen battery can cause it to explode. Let it thaw completely before charging.
- Leaking Acid: Wet, oily liquid pooled on top of the battery case usually indicates an acid leak. Wash your hands if touched, and have the battery professionally towed or replaced.
- Continuous Clicking with No Crank: If the starter motor clicks rapidly or hums weakly despite a donor car being revved, your starter motor, neutral safety switch, or alternator may have failed entirely.
Frequently Asked Questions
How long should you drive a car after jump starting it?
Drive the vehicle continuously for at least 30 minutes at highway or suburban speeds. The alternator requires sustained engine RPM to recharge a depleted battery to a self-sufficient state. Avoid idling in traffic or making brief stop-and-start trips right after a jump.
Can you jump start a car with leads using an electric car or hybrid?
Most hybrid and electric vehicles (EVs) have an auxiliary 12V battery that can be jumped to boot up the high-voltage contactors. However, do not use an EV or hybrid as the donor car to jump-start a conventional gas engine. The high cranking draw of a standard starter motor can fry the DC-to-DC converters inside hybrid and EV electrical drivetrains.
Why does my car die right after removing the jumper cables?
If the engine stalls immediately after disconnecting the leads, your battery is likely not the only problem. Once running, the engine relies on the alternator to supply electrical current. An immediate stall indicates a failing alternator, a snapped serpentine belt, or a blown main fusible link.
Can you jump start a manual car by pushing it?
Yes. Manual transmission cars can be “bump started” or “push started” if jumper leads are unavailable. Put the vehicle in second gear, hold down the clutch pedal, have bystanders push the car up to 5–10 mph, turn the ignition to the “ON” position, and quickly pop the clutch while giving it a slight throttle.